javascript 實現動態側邊欄實例詳解
編輯:關於JavaScript
javascript 實現動態側邊欄
總的來說就是利用 鼠標懸停onmouseover 和 鼠標移除onmouseout 這兩個時間來完成的。
首先是HTML 結構
<body>
<div id="div1">
<span>側邊欄</span>
</div>
</body>
然後是css的樣式:
#div1{
  width:150px;
  height:200px;
  background:#999999;
  position:absolute;
  left:-150px;}
span{
  width:20px;
  height:70px;
  line-height:23px;
  background:#09C;
  position:absolute;
  right:-20px;
  top:70px;}
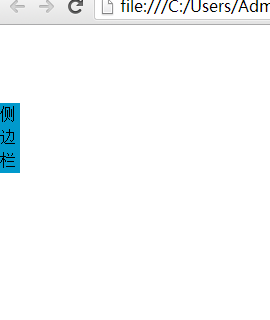
默認的樣式 側邊欄是隱藏起來的如圖:

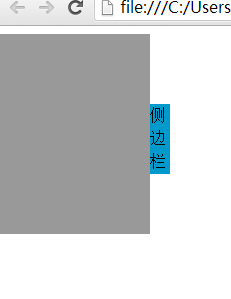
當鼠標移入以後如圖:

下面是完整代碼:
<!DOCTYPE html PUBLIC "-//W3C//DTD XHTML 1.0 Transitional//EN" "http://www.w3.org/TR/xhtml1/DTD/xhtml1-transitional.dtd">
<html xmlns="http://www.w3.org/1999/xhtml">
<head>
<meta http-equiv="Content-Type" content="text/html; charset=utf-8" />
<title>無標題文檔</title>
<style type="text/css">
#div1{
  width:150px;
  height:200px;
  background:#999999;
  position:absolute;
  left:-150px;}
span{
  width:20px;
  height:70px;
  line-height:23px;
  background:#09C;
  position:absolute;
  right:-20px;
  top:70px;}
</style>
<script>
window.onload=function(){
  var odiv=document.getElementById('div1');
  odiv.onmouseover=function ()
  {

    startmove(0,10);//第一個參數為div  left屬性的目標值  第二個為 每次移動多少像素

    }
 odiv.onmouseout=function ()
 {
   startmove(-150,-10);
   }
  }

  var timer=null;
function startmove(target,speed)
{

  var odiv=document.getElementById('div1');
clearInterval(timer);
   timer=setInterval(function (){

    if(odiv.offsetLeft==target)
    {
      clearInterval(timer);
      }
      else
      {
    odiv.style.left=odiv.offsetLeft+speed+'px';
      }

    },30)

  }

</script>
</head>

<body>
<div id="div1">
<span>側邊欄</span>
</div>
</body>
</html>
感謝閱讀,希望能幫助到大家,謝謝大家對本站的支持!
小編推薦
熱門推薦