javascript和jquery分別實現用戶登錄驗證
編輯:關於JavaScript
在上一篇文章http://www.jb51.net/article/83504.htm中,用javascript實現了用戶驗證,但並沒有對密碼進行驗證,這次追加了這個功能,並分別用javascript和jquery實現。
一.用jquery的ajax實現的關鍵代碼
實現如下
/*jquery實現
$(document).ready(function(){
  $("#account").blur(function(event) {
    $.ajax({
      type:"GET",
      url:"checkAccount.php?account="+$("#account").val(),
      dataTypes:"text",
      success:function(msg){
        $("#accountStatus").html(msg);
      },
      error:function(jqXHR) {
        alert("賬號發生錯誤!")
      },
    });
  });

  $("#password").blur(function(event) {
    $.ajax({
      type:"GET",
      url:"checkPassword.php?",
      dataTypes:"text",
      data:"account="+$("#account").val()+"&password="+$("#password").val(),
      success:function(msg){
        $("#passwordStatus").html(msg);
      },
      error:function(jqXHR) {
        alert("密碼查詢發生錯誤!")
      },
    });
  });
}); */
二.用javascript實現的關鍵代碼
實現如下
//javascript實現
  function checkAccount(){
    var xmlhttp;
    var name = document.getElementById("account").value;
    if (window.XMLHttpRequest)
     xmlhttp=new XMLHttpRequest();
    else
     xmlhttp=new ActiveXObject("Microsoft.XMLHTTP");

    xmlhttp.open("GET","checkAccount.php?account="+name,true);
    xmlhttp.send();

    xmlhttp.onreadystatechange=function(){
     if (xmlhttp.readyState==4 && xmlhttp.status==200)
      document.getElementById("accountStatus").innerHTML=xmlhttp.responseText;
    }
  }

  function checkPassword(){
    var xmlhttp;
    var name = document.getElementById("account").value;
    var pw = document.getElementById("password").value;
    if (window.XMLHttpRequest)
     xmlhttp=new XMLHttpRequest();
    else
     xmlhttp=new ActiveXObject("Microsoft.XMLHTTP");

    xmlhttp.open("GET","checkPassword.php?account="+name+"&password="+pw,true);
    xmlhttp.send();

    xmlhttp.onreadystatechange=function(){
     if (xmlhttp.readyState==4 && xmlhttp.status==200)
      document.getElementById("passwordStatus").innerHTML=xmlhttp.responseText;
    }
  }
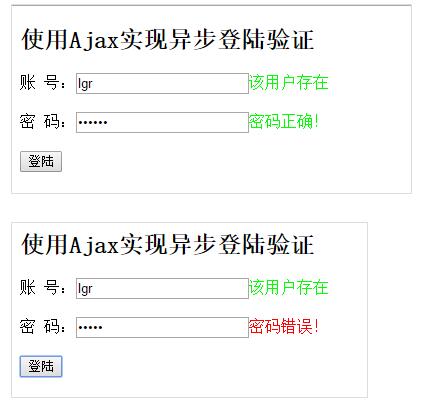
mysql和數據庫部分跟上篇博文的一樣沒有改變,運行結果如下圖

以上就是本文的全部內容,希望對大家的學習有所幫助。
小編推薦
熱門推薦