js+html5實現的自由落體運動效果代碼
編輯:關於JavaScript
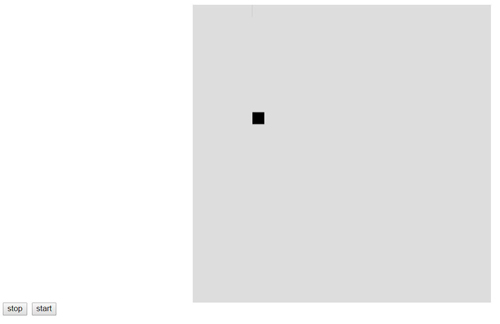
本文實例講述了js+html5實現的自由落體運動效果。分享給大家供大家參考,具體如下:
運行效果截圖如下:

具體代碼如下:
<!DOCTYPE html PUBLIC "-//W3C//DTD XHTML 1.0 Transitional//EN"
"http://www.w3.org/TR/xhtml1/DTD/xhtml1-transitional.dtd">
<html xmlns="http://www.w3.org/1999/xhtml">
<head>
 <title>canvas自由落體</title>
 <script type="text/javascript" >
  var canvasheight = 500;
  var canvaswidth = 500;
  var g = 9.8;
  var plusV = 0.5;
  function Block(vo, x, y, width, height, g, context) {
   var _self = this;
   _self.vo = vo || 0;
   _self.x = x;
   _self.y = y;
   _self.prevX = x;
   _self.prevY = y;
   _self.g = g;
   _self.height = height;
   _self.width = width;
   _self.prevTime = new Date().getTime();
   context.fillStyle = "black";
   _self.down = function () {
    var time = (new Date().getTime() - _self.prevTime) / 200,
     y = _self.vo * time + 1 / 2 * _self.g * time * time + _self.y;
    //console.log("down:time=" + time + ":y=" + y + ":" + _self.vo);
    if (y + _self.height >= canvasheight) {
     _self.g--;
     _self.vo = _self.g * time;
     _self.prevTime = new Date().getTime();
     _self.up();
    } else {
     context.clearRect(_self.prevX, _self.prevY - 1, _self.prevX + _self.height, _self.prevY + _self.width);
     context.fillRect(_self.x, y, _self.width, _self.height);
     _self.prevX = x;
     _self.prevY = y;
     setTimeout(function () {
      _self.down();
     }, 30);
    }
   }
   _self.up = function () {
    var time = (new Date().getTime() - _self.prevTime) / 200,
     v = _self.vo - _self.g * time,
     y = canvasheight - _self.height - _self.vo * time + 1 / 2 * _self.g * time * time;
    //console.log("up:time=" + time + ":v=" + v);
    if (v <= 0) {
     _self.vo = 0;
     _self.y = y;
     _self.prevTime = new Date().getTime();
     if (y + _self.height < canvasheight) {
      _self.down();
     } else {
      return;
     }
    } else {
     context.clearRect(_self.prevX, _self.prevY - 1, _self.prevX + _self.height , _self.prevY + _self.width);
     context.fillRect(x, y, _self.width, _self.height);
     _self.prevX = x;
     _self.prevY = y;
     setTimeout(function () {
      _self.up();
     }, 30);
    }
   }
  }
  window.onload = function () {
   var canvas = document.getElementById('canvas');
   var context = canvas.getContext('2d');
   height = canvas.offsetHeight;
   var block = new Block(0, 100, 0, 20, 20, g, context);
   block.down();
  }
 </script>
</head>
<body>
<center>
<canvas id="canvas" width="500" height="500" style="background:#DDDDDD" ></canvas>
</center>
<input type="button" value="stop" onclick="stop()" />
<input type="button" value="start" onclick="start()" />
</body>
</html>
更多關於JavaScript運動相關內容感興趣的讀者可查看本站專題:《JavaScript運動效果與技巧匯總》
希望本文所述對大家JavaScript程序設計有所幫助。
- 上一頁:js+canvas繪制五角星的方法
- 下一頁:js判斷上傳文件後綴名是否合法
小編推薦
熱門推薦